Solar power turns sunlight into usable electricity through photovoltaic panels. The panels produce direct-current power, while an inverter converts it into the alternating current most homes use. A battery can store surplus energy, but it adds cost and installation complexity. The right setup depends on your roof, electricity use, local weather, and utility connection.
For a grounded perspective, solar analyst Jenny Chase of BloombergNEF has emphasized that solar deployment depends on practical economics and local conditions. In plain terms: a system must fit the site, not just the sales brochure. That distinction matters. A south-facing roof with clear midday sun may perform very differently from a shaded roof with limited usable space.
This guide explains how to install a solar power system step by step, from checking your energy bills and roof to choosing equipment, arranging qualified installation, and verifying system performance. Expect details such as panel placement, inverter selection, wiring checks, and monitoring—not just a list of parts. A safe installation requires electrical expertise. Do not treat a diagram as a substitute for a qualified professional, and confirm applicable permits and utility requirements before work begins.
Some estimates will be imperfect. Weather changes. Household habits change, too. That is why the process should include realistic production estimates and a careful review of system performance after activation. The goal is not simply to put panels on a roof. It is to build a system that reliably serves the home, with clear expectations about cost, output, and maintenance.
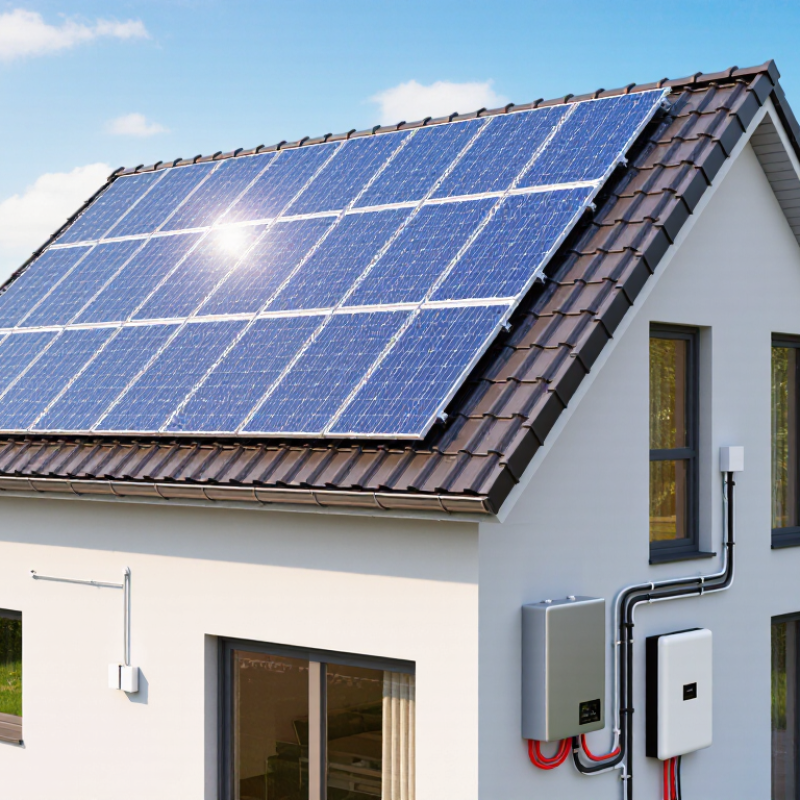
Solar power is electricity produced from sunlight. Most home systems use photovoltaic panels, whose semiconductor cells release electrons when light strikes them. This movement creates direct current, or DC. An inverter changes it into alternating current, or AC, which household appliances can use. The process is quiet. It does not burn fuel at the point of generation, but output varies with sunlight, shade, panel angle, and temperature.
A typical system includes panels, roof or ground mounting rails, electrical wiring, an inverter, and safety devices that isolate or protect circuits. A production meter may track generation, while a utility meter records electricity moving between the home and the grid. Batteries are optional; they store surplus energy for later use, but add cost and equipment. On a cloudy afternoon, panels may still produce power, just less than under clear midday sun. That detail is easy to overlook.
System design depends on the roof’s condition, orientation, local weather, and household electricity use. A shaded chimney can reduce output from nearby panels, so a site assessment matters. The numbers can look tidy on a diagram. Real roofs are not always tidy, and estimates should account for losses from wiring, heat, and inverter conversion. A qualified installer can check structural support, electrical capacity, and safe placement before installation.
Solar panels turn sunlight into electricity through photovoltaic cells. When daylight reaches the cells, it prompts electrons to move and creates direct-current electricity. The process works even on cloudy days, though output usually falls. A cool, bright morning can produce more power than a hot afternoon. Shade from a chimney or nearby tree may reduce output, so panel placement matters.
A solar inverter converts the panels’ direct current into alternating current, which household appliances can use. If the system includes a battery, a charge controller or hybrid inverter manages electricity flowing into storage. Later, the battery can supply power after sunset or during an outage, depending on the system design. Not every home needs one. Batteries add cost, and their usable capacity is lower than their advertised total capacity. That part is easy to overlook.
A meter or monitoring display can show how much electricity the panels generate, how much the home consumes, and whether energy is charging the battery or flowing to the grid. For example, a sunny afternoon may fill a battery while the washing machine runs. Actual results vary with weather, roof direction, equipment, and household use. Check the system’s specifications and have a qualified installer assess the site; a roof that looks sunny at noon may be shaded in winter.
| Stage or Component | What Happens | Typical Details | Result |
|---|---|---|---|
| 1. Assess the Site | Review the roof or ground area, its condition, shading, orientation, and available installation space. | Solar production varies with location, roof angle, direction, shade, weather, and system design. A qualified assessment also checks structural and electrical requirements. | A suitable installation area and an estimate of expected solar production. |
| 2. Review Electricity Use | Examine electricity bills and usage patterns to understand how much energy the system should serve. | Consumption is commonly measured in kilowatt-hours (kWh). Local utility rules, export compensation, and future changes in usage can affect system sizing. | A target system size based on household or building needs. |
| 3. Design and Obtain Approvals | Plan the array, electrical equipment, wiring, protection, and, if desired, battery storage. Apply for required permits and utility approval. | Requirements vary by location. Designs should comply with applicable building and electrical codes and utility interconnection rules. | An approved design ready for installation. |
| 4. Mount the Solar Panels | Install mounting hardware and secure photovoltaic (PV) modules in the planned positions. | PV cells convert sunlight into direct-current (DC) electricity. Panels generate less power when sunlight is weak or they are shaded. | A solar array that produces DC electricity when illuminated. |
| 5. Convert Electricity | Connect the array to an inverter, which converts DC electricity into alternating-current (AC) electricity used by most building circuits. | Some systems use a central string inverter; others use module-level power electronics. Equipment choice depends on the design and site conditions. | AC electricity available for use by compatible building loads. |
| 6. Add Battery Storage (Optional) | Connect a compatible battery and controls to store some solar energy for later use. | Batteries store energy chemically and deliver electricity through power-conversion equipment. Usable capacity and power output are different specifications; neither guarantees a particular backup duration. | Stored energy that may be used when solar production is low, subject to system settings and battery capacity. |
| 7. Connect and Inspect | Complete wiring, protective devices, grounding, utility interconnection, inspections, and commissioning. | Grid-connected systems generally require utility authorization before operating in parallel with the grid. Backup operation requires equipment designed for that purpose. | A tested system authorized to operate under applicable local requirements. |
| 8. Monitor and Maintain | Check system production and alerts, keep equipment accessible, and arrange repairs when needed. | Output changes with season, weather, shading, and equipment condition. Follow the system documentation for inspection and cleaning recommendations. | Ongoing visibility into system performance and timely attention to faults. |
| How Energy Is Used | Solar electricity can power building loads first; surplus may charge a battery or be exported to the grid, depending on system configuration and local rules. | At night or during low production, electricity may come from a battery, the grid, or another configured source. | A system that can supply on-site loads and, where configured, store or export excess energy. |
Before estimating solar production, inspect the roof as it exists—not as it appears in a sunny afternoon photo. Note its age, material, pitch, and usable area, then check for chimneys, vents, and nearby trees. Shade shifts with the seasons. A branch that clears the panels in June may cast a long shadow in December. Record roof conditions from several angles, and ask a qualified professional to assess structural capacity before installation.
Location matters, too. The National Renewable Energy Laboratory’s 2016 rooftop solar study estimated that suitable rooftops across the United States could support about 1,118 gigawatts of capacity and generate 1,432 terawatt-hours annually. Those are national estimates, not a forecast for any one home. For a property-specific estimate, NREL’s PVWatts calculator uses inputs such as location, roof orientation, tilt, and system losses. Small errors in those inputs can change the result.
Look at your electricity bills across a full year, not just one month, and note when household demand peaks. Compare that pattern with the roof’s sun exposure. A south-facing roof may perform well in many U.S. locations, but local shade and roof geometry can matter more than direction alone. Take photos at different times. It is easy to miss a problem. I have found that even careful roof notes leave uncertainties; a site visit may correct them.
A reliable solar installation starts with a careful site assessment, not a rushed equipment order. Check roof age, shading, orientation, and available space. Note where chimneys or trees cast shadows across the roof at different times. The roof may look sunny at noon and still lose useful morning light.
Next, review electricity bills and estimate the system size that fits household use. A qualified installer can assess structural capacity, wiring, and the main electrical panel, then model expected output using local weather and shading data. Ask for clear assumptions, including seasonal production and likely system losses.
Small details matter. Compare proposals by equipment specifications, workmanship, warranty terms, and projected energy—not just the headline price. I would also leave room for uncertainty: estimates are not guarantees, and future usage can change.
Before installation, confirm required utility approvals and local permits with the relevant authorities. The installer typically mounts the racking, secures panels, connects electrical components, and tests the system. Inspect visible cable runs and ask how shutdown controls work. After inspection and utility approval, the system can be connected and monitored.
Keep the final plans and commissioning records; they are easy to misplace.
After mounting the panels and inverter, connect the system only after confirming the circuit is de-energized. Use an electrician qualified for local electrical requirements. Check cable polarity, connector seating, grounding continuity, and weatherproof seals. Loose connections can create heat and reduce output. The IEA PVPS Trends 2024 report recorded about 456 gigawatts of new solar capacity worldwide in 2023. That rapid growth makes careful commissioning more important, not less.
Test each circuit before closing the distribution equipment. Measure open-circuit voltage and compare it with the design values. Inspect insulation resistance when required by local rules. Then activate the system in the sequence stated by the equipment manuals. Watch the monitoring screen for abnormal voltage, current, or error messages. The National Renewable Energy Laboratory notes that performance estimates depend on irradiance, temperature, shading, and system losses. A clear day can still produce disappointing results. Dust, heat, and partial shade matter.
Maintenance should include visual checks after severe weather, especially around roof penetrations and cable clips. Clean panels only when soiling visibly affects production, and avoid abrasive tools. Review monthly energy data against seasonal expectations. A sudden drop deserves investigation. Do not ignore small anomalies. My practical preference is to photograph connections during commissioning, because memory is unreliable. However, photographs cannot replace electrical testing or a qualified inspection. Records should include test readings, dates, repairs, and weather conditions. Some installations need more attention than expected. That is normal.
Solar power is electricity made from sunlight. Photovoltaic cells release electrons when light reaches them. The process is quiet.
Panels produce direct current, or DC. An inverter changes DC into alternating current, or AC, for household appliances.
Yes, but production usually decreases. A cloudy afternoon may still generate electricity. Clear midday light normally produces more.
A typical system includes panels, mounting rails, wiring, an inverter, meters, and safety devices. Batteries are optional.
No. Batteries store surplus electricity for later use. Usable capacity is lower than the advertised total capacity.
Shade, roof direction, panel angle, heat, wiring losses, and inverter conversion can reduce output. A chimney may cast a narrow shadow nearby.
Check roof age, structural strength, shading, available space, and household electricity use. Keep recent electricity bills nearby.
No. Estimates depend on weather, seasonal sunlight, equipment, and future energy use. Neat diagrams can hide real-world losses.
A qualified installer assesses the site, mounts the panels, connects electrical equipment, and tests the system. Approvals may be required.
A meter or monitoring display can show production, household use, battery charging, and electricity moving to the grid. Readings may vary daily.
Solar power converts sunlight into usable electricity through photovoltaic panels, an inverter, wiring, and, when needed, battery storage. The panels produce direct current when exposed to sunlight, while the inverter changes it into alternating current for household appliances. Excess energy can be stored in batteries or sent to the electrical grid, depending on the system design and local requirements.
Learning how to install a solar power system step by step begins with evaluating the property’s sunlight, roof condition, available space, energy consumption, and electrical capacity. The installation typically involves planning the layout, mounting the panels securely, connecting the wiring and inverter, and installing optional batteries. Afterward, the system must be connected, tested for safe and reliable performance, and inspected according to applicable regulations. Regular maintenance includes checking connections, cleaning panels when necessary, monitoring energy production, and addressing faults promptly.

Smart Energy